

The Nest Hello doorbell is one of the most popular doorbells of the current times. It is a high-speed doorbell that offers a variety of features. The inclusion of HDR Video recording and vast field of view makes it the best doorbell available in the market. However, when it comes to installing the said doorbell, people usually wonder whether you can install Nest Hello without an existing doorbell?
To ease your troubles, I have put together a step-by-step guide that will help you install your Nest Hello doorbell!
Can you install a Nest doorbell without an existing doorbell?
Yes, you can easily install a Nest doorbell even if there is no existing doorbell or chime. However, you will require an indoor power adapter with an adequate voltage that connects to a wall outlet for this kind of installation. Installation of a Nest doorbell without an existing doorbell will save you from the frustration of hardwiring it.
What does the Nest Hello video doorbell require for installation?
There are certain things that you need to install the Nest Hello video doorbell. You will receive some items within the box yet; you will need to gather a few tools. Hence, I have enlisted all the required material along with the required apps below!
Comes with the box
- Nest Doorbell (wired)
- Wallplate
- Wedge
- Chime connector
- Wire extenders
- Drill bit
- Screws
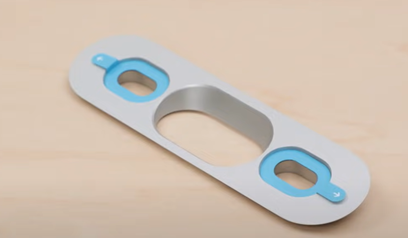
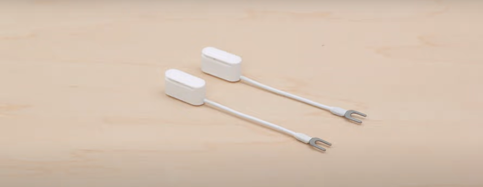
- Unlock tool
Required Tools
- Ladder (to climb up to your doorbell)
- Bubble level (to examine doorbell’s position)
- Power drill with Phillips bit
- Phillips screwdriver
App and internet requirements
- The latest version of the app
- A compatible cell phone
- Your Wi-Fi password
- A stable internet connection, with a minimum of 2 Mbps upload speed for each Nest camera or doorbell installed in your home
Does the Nest doorbell need to be wired?
Yes, the Nest doorbell needs to be wired with a chime and the right transformer. If your house does not have wires from the existing doorbell, you can use an indoor power adapter.
How do I install the Nest Hello doorbell?
Installing the Nest Hello doorbell is super easy! Below are detailed instructions that will help you install your Nest Hello doorbell.
- Before you proceed with the installation of the Nest Hello doorbell, make use of a compatibility checker to examine whether your existing doorbell’s wiring is compatible or not.
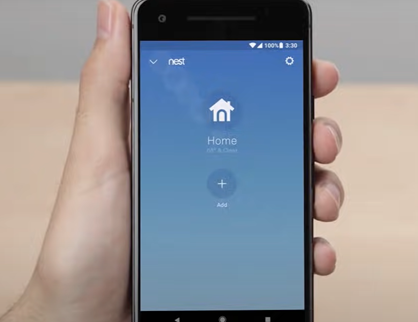
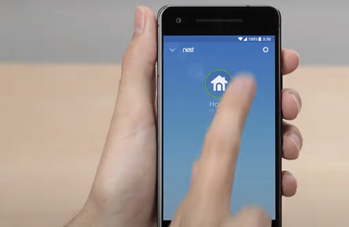
- Now, download the free Nest app available on iOS and Android, and sign in.
- Once you have signed into your account, press on the plus sign present in the center of the screen. This will enable you to add your new Nest Hello.

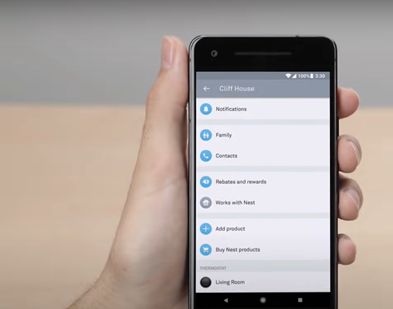
- In case you are already a Nest customer, tap on the gear present at the top rightcorner of the screen.

- Next, scroll down to the bottom and click on Add product.
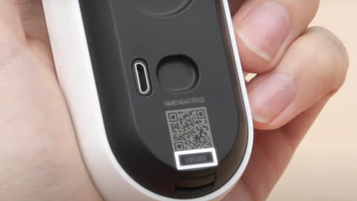
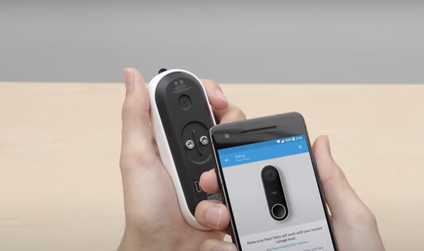
- Your screen will then show a QR code. Bring your phone near the device and scan the QR code present on it. In case you are unable to scan the QR code make sure there is good lighting.

- Even after multiple tries you are unable to scan the code, press on continue without scanning so you can enter the code manually.

- You can easily find the QR code at the back of your device.
- Then the Nest app will guide you through each step of setting up your device.
- Now, go to your main home breaker and shut off the power going to your chime. This is essential for safety. You can confirm whether the power is off or not by ringing your bell once.
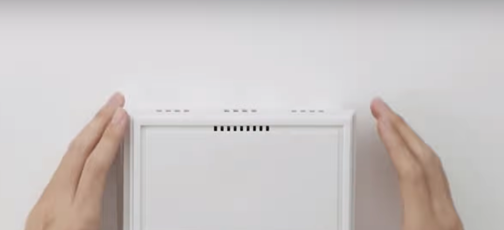
- Remove the cover of your doorbell’s chime.
- Now, capture a picture of the chime’s wiring with your phone. This will aid you in troubleshooting later.
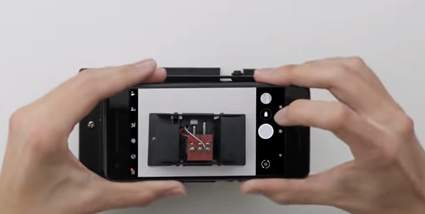
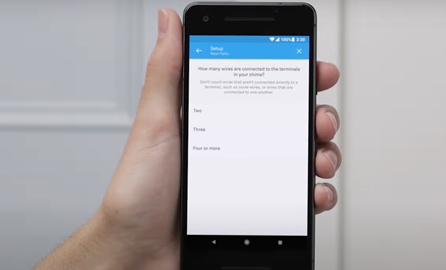
- Determine the number of wires in your chime connector and feed that into your app. Most chime connectors have 2 wires but yours might have more.
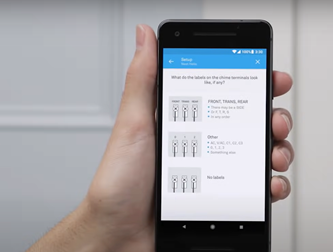
- Select the labels in the app that correspond with the labels present beside your wires in the chime connector.
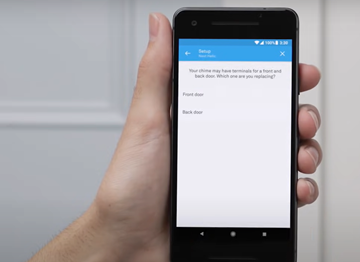
- Now, select the door on which you wish to change the bell whether it is the front door or backdoor. This will let you know how to accurately connect the wires.
- Once you have entered all the information, the app will guide on how to accurately connect chime wires to the Nest connector.

- Now, you are required to install the Nest connector. In case, you do not install the Nest connector your doorbell system can be damaged.
- Follow the instructions in the app carefully in order to correctly install the Nest connector.
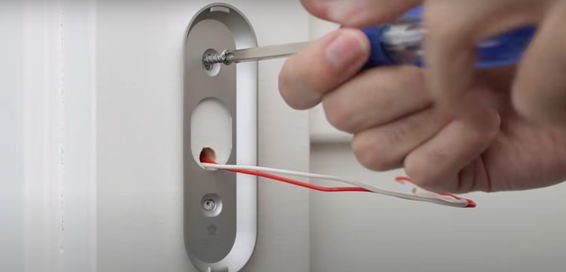
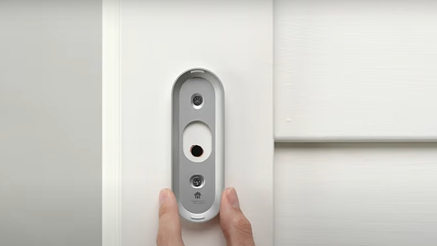
- After you have installed the Nest connector, you need to cover the chime box again and remove your current doorbell.
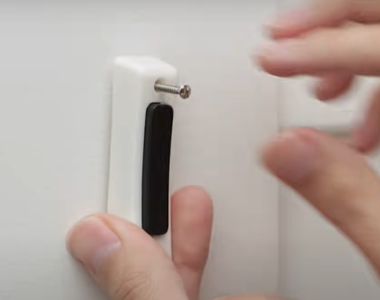
- After removing the existing doorbell, install the Nest Hello. In case you wish to change the angle of Nest Hello, you can make use of the included wedge.
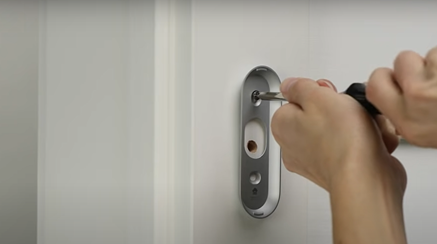
- For installation of Nest Hello, initially you need to mark the screw position on the wall. Make sure the Nest logo is positioned at the bottom.

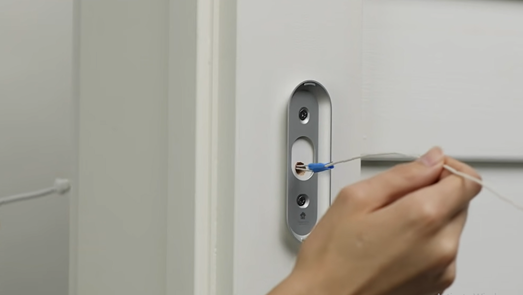
- Now, drill the marked holes and screw the Nest Hello doorbell. Make sure that the existing wires come through the bottom half of the plate.
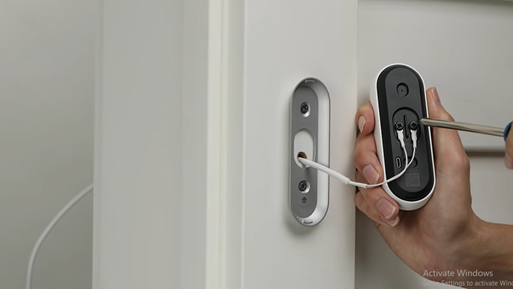
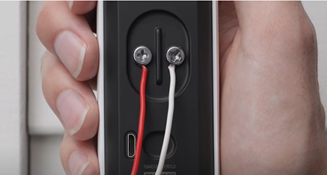
- After you have securely mounted the wall plate. Now, connect the wires on the Nest Hello.

- Make sure the wires face down, not up. This will enable you to prop any excess wire back in the wall.

- In case the existing wires fell too short, make use of the wire extenders included in the box.
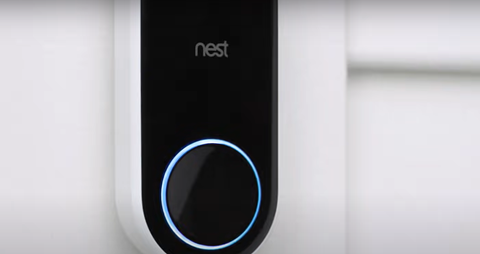
- Now, place the Nest Hello on the wall plate and turn the power back on. After restoring the power, the Nest Hello will turn On and its light ring will turn blue.

- In case there is no light on the light ring, go back to the chime and examine whether you have correctly installed the Nest connector.
- Lastly, you need to finish up the newly installed Nest Hello in the app.

- Now, all you need to do is enter the Wi-Fi password and your Nest Hello will be successfully connected.
Does Nest Hello come with a power adapter?
Yes, the Nest Hello contains a cable and an AC adapter to plug in the power outlet.
How do you install a Nest doorbell with an indoor power adapter?
In case you do not have an existing chime or doorbell, you can still make use of Nest Hello by connecting it with an indoor power adapter and plugging it in the power outlet. I have enlisted detailed instructions that will guide you through installing the Nest doorbell with an indoor power adapter.
- Download the Nest app and create your account or sign in if you already have an account.
- Once you have signed in, press the plus sign to add Nest Hello.
- In case you are already a Nest customer, tap on the setting gear present at the top-right corner of the screen.
- Scroll down to the bottom of the screen and tap on Add product.

- Now scan the QR code present at the back of Nest Hello, if you can’t scan the QRcode adjust the lighting.
- If you are unable to scan it even after adjusting the lightning, tap on continue without scanning. This will enable you to manually enter the code present at the back of your Nest Hello.
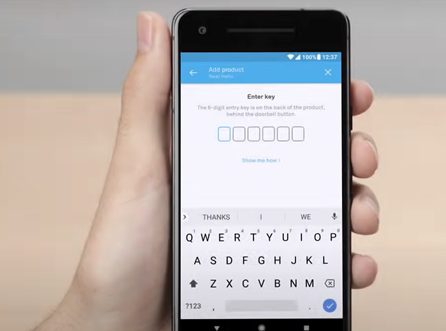
- You can locate the code at the back on the bottom side of your Nest Hello.

- Now the screen will show you steps for installation, press Skip for that because you will be installing with an indoor power adapter.

- Now, find an ideal spot to install the Nest Hello.
- Make use of the wall plate to mark holes for drilling.
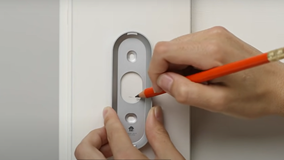
- Make sure that the mark you made is present in the bottom half of the wall plate.

- One thing to keep in mind is, before proceeding with drilling, make sure to turn off the power to anything placed near the spot you will be installing the Nest Hello, for instance, porch lights and power outlets. This will help you keep yourself protected during the drilling process.
- Run checks on the building code and make sure there is no internal wiring or plumbing on the spot that you have selected for installation of Nest Hello.
- If you wish to change the angle of Nest Hello, you can utilize the included wedge.

- Now, drill holes on the marked position for power adapter wires.

- Mount the wall plate but make sure that the drilled hole is positioned on the bottom half of the wall plate.
- Drill pilot holes above and below the main hole and screw the wall plate.
- Grab a grommet and slip it over the adapter cable.

- Now, run the adapter cable through the hole that you just drilled in the wall.
- Once you have managed to run the wires through the hole, connect them to Nest Hello. It does not matter which wire you connect to which terminal.
- Make sure that the wires face down instead of facing up. In this way, you will be able to tuck back any excess wires into the hole.
- Now, to attach the Nest Hello, bring it towards the wall plate and press it down from the top. Nest Hello will firmly clip to the wall plate

- Now, run checks and see if there is any issue with the installation. If no issue is found, turn the power back on.
- Lastly plug the power adapter into an indoor power outlet. If the wire falls short you can use an extension cord.
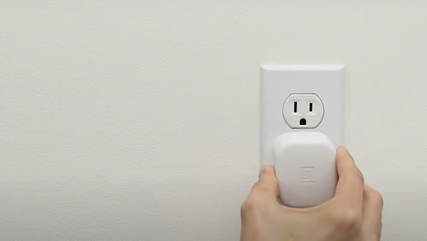
- Once you are down with complete installation and plugging of power adapter, Nest Hello will turn On and the light ring will turn blue.
- In case the light ring does not turn blue check that the adapter is plugged in accurately or try plugging out and the plugging in the adapter.
- Now, you need to finish setting up the Nest Hello within the app. Start by telling the app where you have installed the Nest Hello.
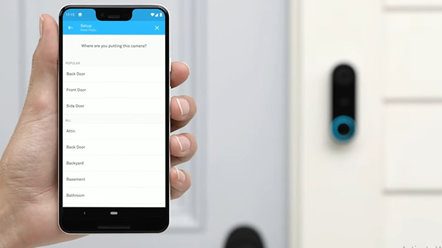
- Lastly, enter your Wi–Fi password and your Nest Hello will be successfully installed.
How does the Nest doorbell get power?
The Nest Hello doorbell is designed to either get power from the existing chime’s wire, or it can be installed in a way to receive power from an indoor power adapter.
How do I connect to my Nest doorbell?
Once you have installed and set up the Nest Hello doorbell within the Nest app, you can proceed to connect it. I have discussed instructions on how to set up your Nest doorbell below!
- First open the Google Home app.
- Then press on the + sign present on the top-left corner of the screen.
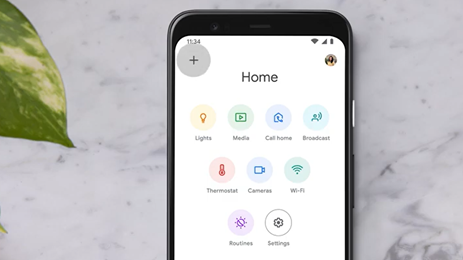
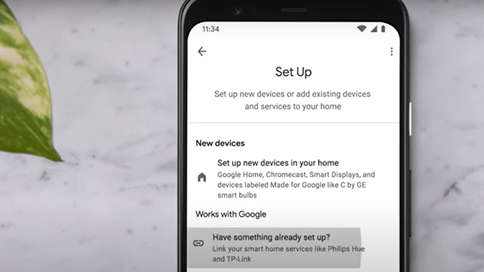
- Now click on Set up device.

- Now press on the option that says Have something already set up?
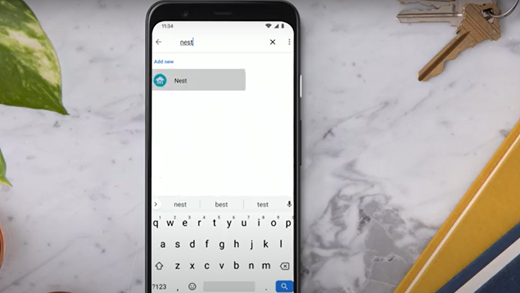
- Type Nest in the search bar and select the Nest once it shows up.
- Now sign into your Nest account.
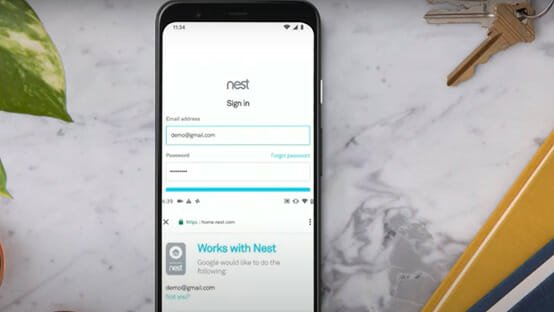
- Your screen will now display a Works with Nest page, scroll to the bottom and tap Allow.

- Your device has been successfully added to the Google Home app, now choose the device you want to set up.
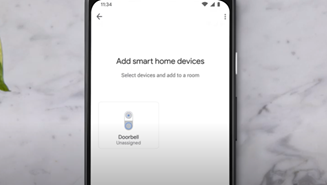
- Now, select the room that your chosen device is located in and then tap Next.

- You Nest Hello video doorbell is now connected and you can conveniently use it!
Final thoughts on installing Nest Hello with an existing doorbell!
In case you do not have an existing chime or doorbell, there is nothing that can stop you from using the Nest Hello video doorbell!
The Majority of people are unaware of the fact that one can easily make use of Nest Hello in the absence of an existing chime or doorbell by simply using an indoor power adapter and plugging it in the power outlet. It’s that simple.
I hope the steps I have detailed helped you out!
Recent Posts
Maximizing Your Philips Hue Experience: 18 Advanced Tips for the Best Illumination
Wondering how to get the most out of your Philips Hue sytem? Well, we've got 18 advanced tips to master illumination!
Is your Philips Hue light bulb a Z-wave? In this post we explain all there is to learn about the topic. To learn more read this article now!